
Using the principles learnt in the Creating Old World Mods tutorial, and the other tutorials on this site, we will put it all together and make an advanced mod which makes use of XML, DLL, asset and UI modifications.
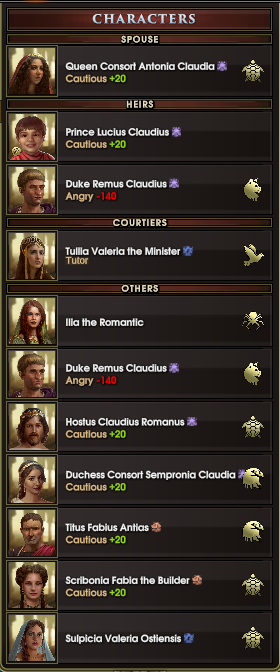
In this tutorial we are go to extend the character list to include all active characters in your nation, and not just the Court. Currently, the character list contains the spouse, heir, succession line and courtiers. We will add a new category labelled "Others" and include characters from the three families who are not in the Court.
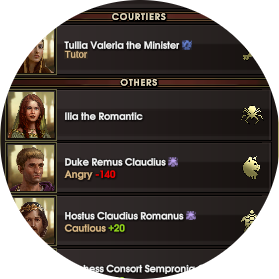
This mod will involve two XML Infos changes, an asset bundle containing the new UI character list template, plus a DLL which holds the code to construct the "Others" character list. The final mod will look like the following image.
Create a new Mod folder named "Character List" and put a ModInfo.xml file in the mod folder. Create the "Infos" and "Assets" folders in the Mod folder.
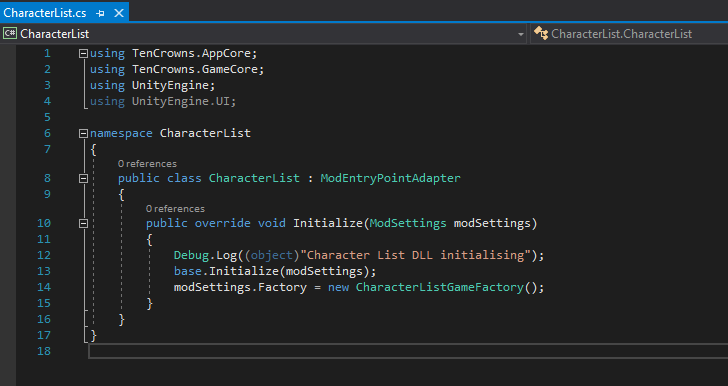
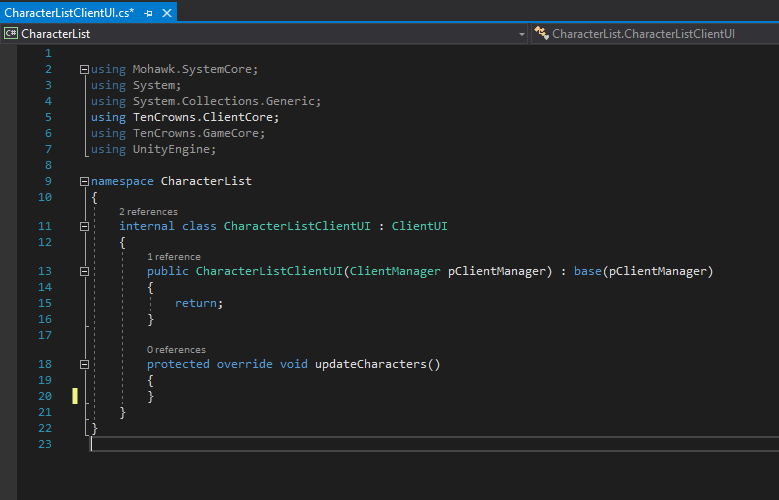
Spin up Visual Studio (or the compiler you're using) and create a basic DLL mod as per my guide.

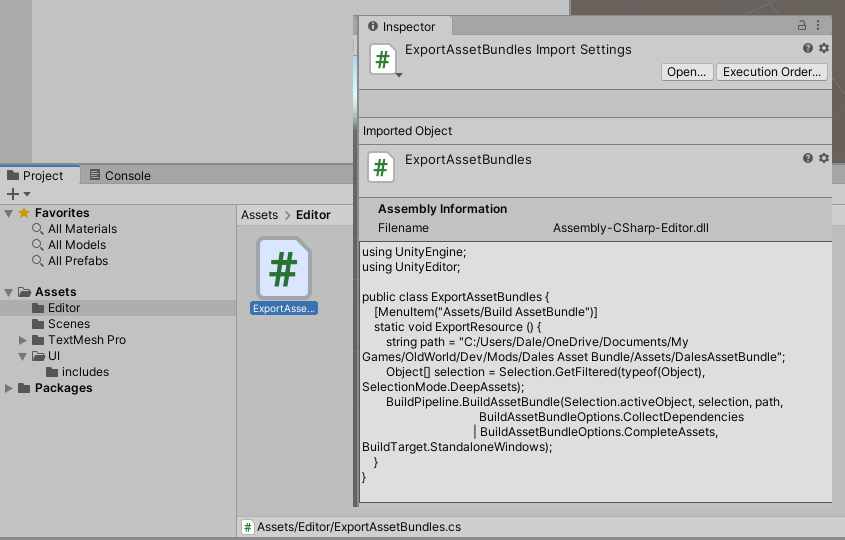
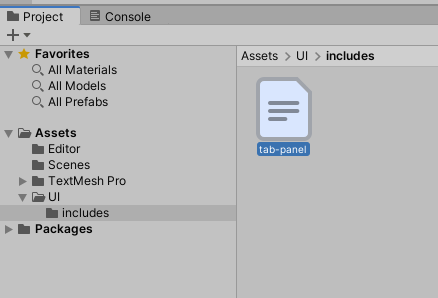
Next, open up Unity and create a new project and set it up for asset bundle making (Custom Assets tutorial). Make a folder structure Assets\UI\Includes as per the image below.
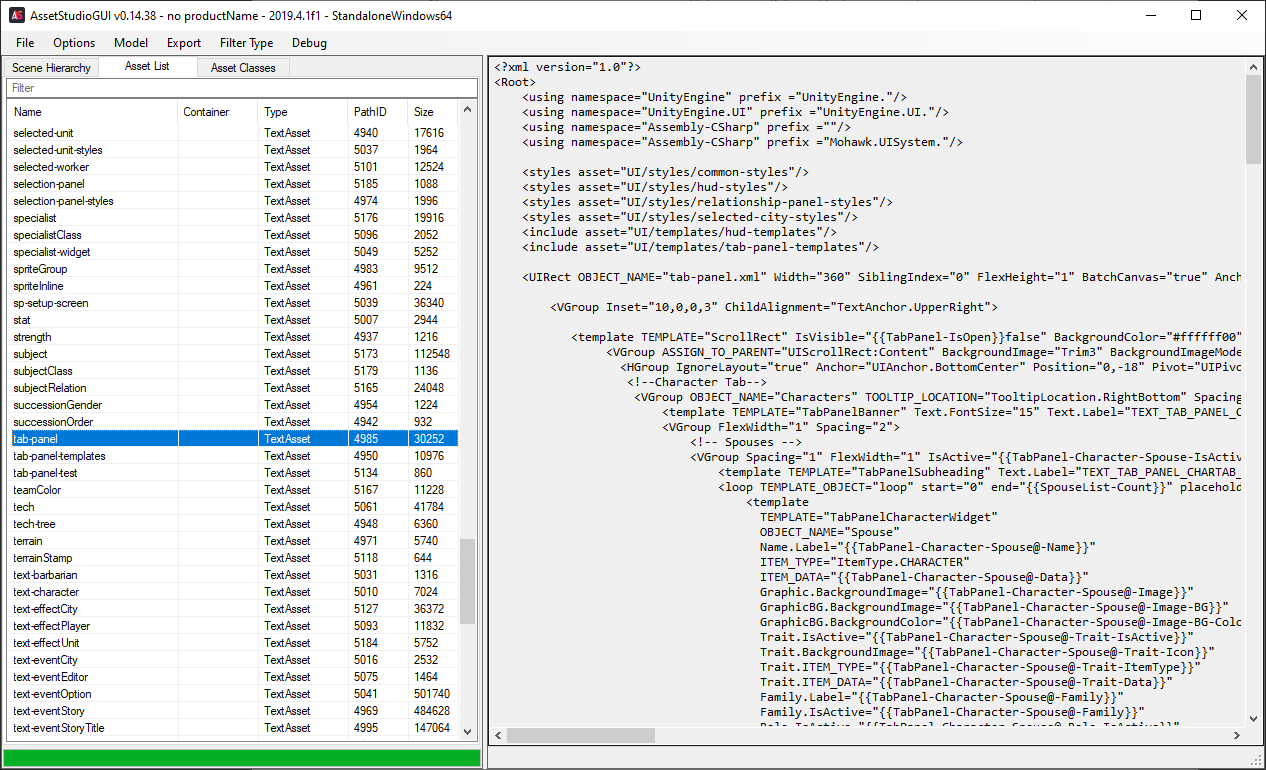
Using a tool such as Asset Studio to view the content of Old World's asset bundles, find and extract the UI TextAsset you wish to modify. Most, if not all, of Old World's UI is exposed via TextAssets in the game's asset bundles. Since we are extending the character list, you will need the file tab-panel.xml, which has the UI script for all the tab overlays at the top-right of the screen.
Import the TextAsset into your Unity project, into the Assets\UI\Includes folder. Make sure that when the file is imported it comes in as the correct filename and extension of XML. Unlike Infos\ files you do not need to have -add, -change, -append in the filename. Don't forget to setup the file to be included in the asset bundle (which ever method you chose to create the asset bundle).
At this point, you have completed setting up the basics of the mod. You have setup a new mod structure, new DLL and new Unity asset bundle to include the UI files in.
Old World UI is scripted via XML files included as TextAssets in the game's asset bundles. For our extended character list, we are adding a new section to the tab which essentially does the same thing as the other sections on this tab: accept a list of characters and display them. Copy and paste the "Court" section of code to a new "Others" section directly below it. You will need to change all references from Courtier to Other in the code section. See below.
    <!-- Others -->
    <VGroup Spacing="2" FlexWidth="1" IsActive="{{TabPanel-Character-OtherList-IsActive}}">
        <template TEMPLATE="TabPanelSubheading" Text.Label="TEXT_TAB_PANEL_CHARTAB_COURT_OTHERS" IsActive="{{TabPanel-Character-OtherList-IsActive}}"/>
        <loop TEMPLATE_OBJECT="loop" start="0" end="{{TabPanel-Character-OtherList-Count}}" placeholder="@">
            <template
              TEMPLATE="TabPanelCharacterWidget"
              OBJECT_NAME="Others"
              Name.Label="{{TabPanel-Character-OtherList@-Name}}"
              Graphic.BackgroundImage="{{TabPanel-Character-OtherList@-Image}}"
              GraphicBG.BackgroundImage="{{TabPanel-Character-OtherList@-Image-BG}}"
              GraphicBG.BackgroundColor="{{TabPanel-Character-OtherList@-Image-BG-Color}}"
              Family.Label="{{TabPanel-Character-OtherList@-Family}}"
              Family.IsActive="{{TabPanel-Character-OtherList@-Family}}"
              Role.IsActive="{{TabPanel-Character-OtherList@-Role-IsActive}}"
              Role.Label="{{TabPanel-Character-OtherList@-Role}}"
              UpperLeft.Label="{{TabPanel-Character-OtherList@-UpperLeftLabel}}"
              Portrait.BackgroundImage="{{TabPanel-Character-OtherList@-Image}}"
              ITEM_TYPE="{{TabPanel-Character-OtherList@-ItemType}}"
              ITEM_DATA="{{TabPanel-Character-OtherList@-Data}}"
              IsActive="{{TabPanel-Character-OtherList@-IsActive}}"
              Trait.IsActive="{{TabPanel-Character-OtherList@-Trait-IsActive}}"
              Trait.BackgroundImage="{{TabPanel-Character-OtherList@-Trait-Icon}}"
              Trait.ITEM_TYPE="{{TabPanel-Character-OtherList@-Trait-ItemType}}"
              Trait.ITEM_DATA="{{TabPanel-Character-OtherList@-Trait-Data}}"
              Selection.IsActive="{{TabPanel-Character-OtherList@-IsSelected}}"
              TOOLTIP_LOCATION="TooltipLocation.Parent"/>
        </loop>
    </VGroup>
UI elements are referenced by tags. Tags can be constructed together to indicate children. For instance, take the tag TabPanel-Character-OtherList.
One great thing about Unity is that these tags are exposed to the C# code. What this means is we can attach to a UI element, child or whatever scene element via the DLL and do what we need. This then leads us to the next section.
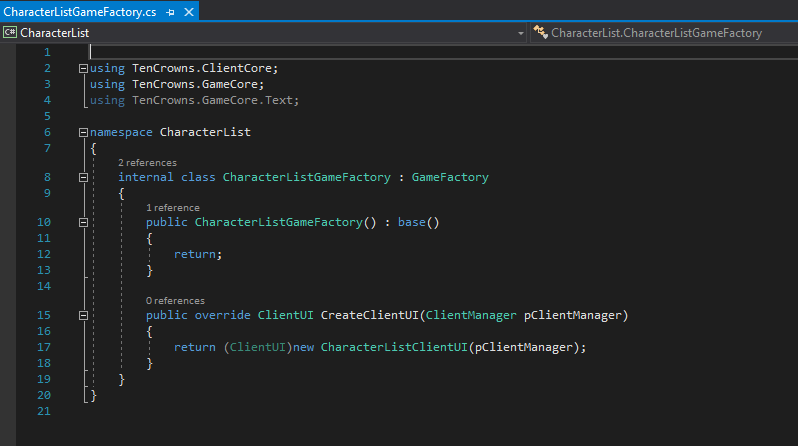
As mentioned above, to attach to a UI element and do what we want we need some DLL code. For our character list the generation of the list of characters sent to the UI element is done via ClientUI::updateCharacters(). Most functions in Old World are exposed to being overridden. All we need to do in the DLL is make our own override class and our new override functions. The game takes care of the rest. The ClientUI class is created in the GameFactory class. The GameFactory class is already exposed to the modding entry point so that is where we begin.
We need our DLL to do the following:
After we make the required DLL edits for the first two points (I am assuming you have some knowledge of C# and know how to contruct classes etc) we have the following code in our project:

Now we need to complete our final point on our DLL to do list above. We need to override ClientUI::UpdateCharacters() to include our code for the UI element.
We then copy and paste the function's code from the source files from \Reference\Source\Game\ClientCore\ClientUI.cs UpdateCharacters(). We need to include the existing code as we have overridden the default function with our own. The final step of our DLL changes is to include our code to create an Others character list and attach it to the UI element we created above. The specific code is show below.
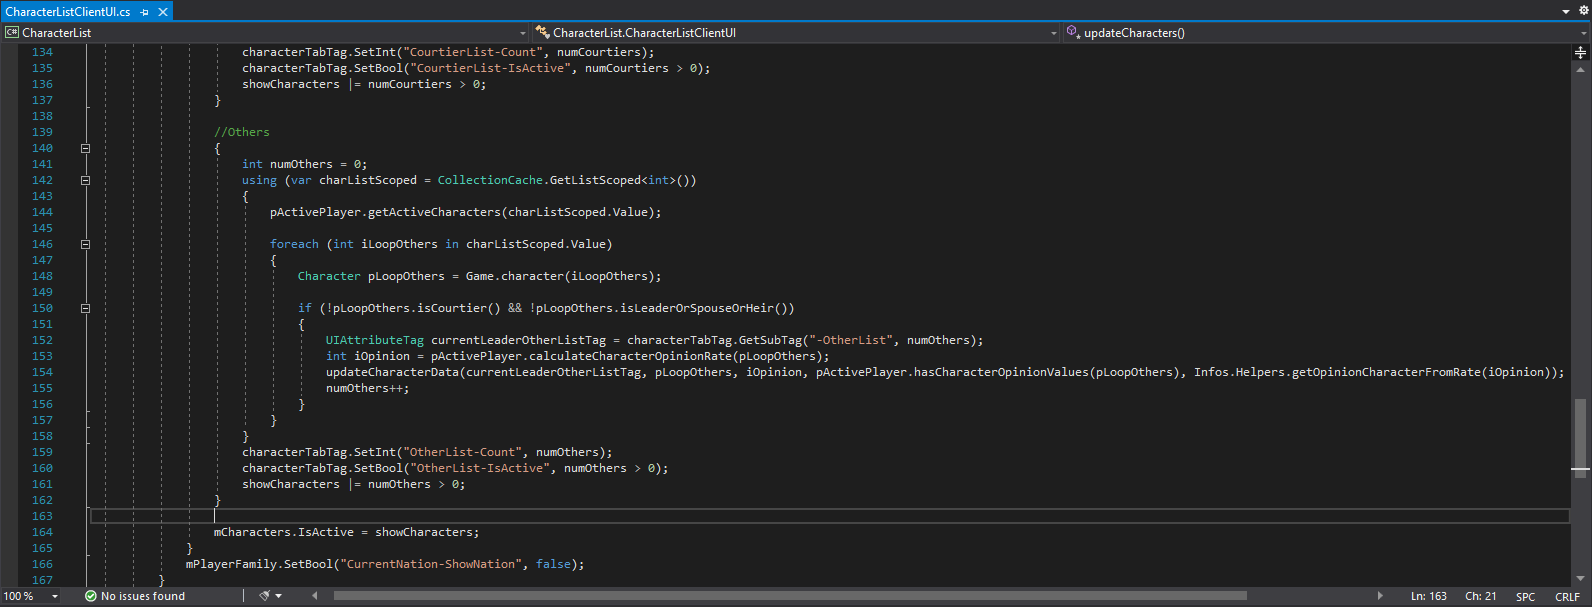
Note: a bug was found after publishing this tutorial that members of the succession chain were being listed in the Others character list. To remove the succession chain from the Others list, you need to modify the "if" statement to:
if (!pLoopOthers.isCourtier() && !pLoopOthers.isLeaderOrSpouseOrHeir() && !pLoopOthers.isSuccessor())
That is all of the DLL code that we need for our character list.
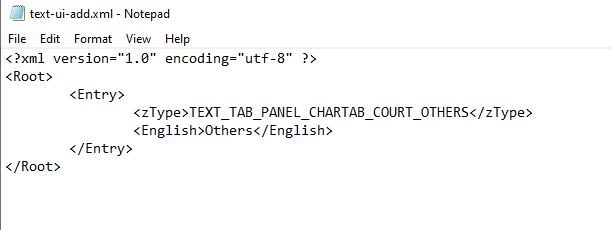
When we created our UI changes we made reference to a text label called TEXT_TAB_PANEL_CHARTAB_COURT_OTHERS. The only XML change we need to make is to add a text reference. This is done in the file text-ui-add.xml.
At this point we have now finished all the changes that we need to implement for our extended character list. All that is left to do is to put it all together and run it. Create the asset bundle with the UI changes and place in the mod's Assets folder. Compile the DLL and place it in the mod folder with the ModInfos.xml file. Finally, make sure the text-ui-add.xml file is in the mod's Infos folder.
Now run the game. Go into the Mods menu and turn your character list mod on. Start a new game and enjoy the extended character list.
Extended Character List mod & source files - 16 July 2020